Convert Unity Terrain to Low Poly Using Polaris 3.5
- Tâm Trần Ngọc
- Jun 6
- 4 min read

As far as I know, Unity does not have a built-in way to convert terrain to a low poly mesh. This guide uses Polaris 3.5, which includes a dedicated Migration Tool for exactly this. If you already have Polaris, the full conversion takes just a few minutes.
What You Need
An existing Unity scene with one or more Unity Terrains
Optionally, low poly tree prefabs to replace any realistic tree assets after import
Step 1. Open the Polaris Terrain Wizard
In the Hierarchy, right-click and go to 3D Object > Polaris > Terrain Wizard.
On the main page, select Create From Existing Data, then choose Migrate From Unity Terrain to open the Polaris Unity Terrain converter.


Step 2. Add Your Source Unity Terrains
When the converter opens, Polaris automatically collects all Unity Terrains in the scene. You can also drag and drop specific terrains into the source list manually.
These terrains are the source for everything Polaris needs to go from Unity terrain to low poly: height map, hole map, textures, trees, and grass.

Step 3. Generate Matching Polaris Terrains
If you do not already have Polaris terrains set up in the scene, click Generate Matching Terrains.
Polaris creates one terrain for each source Unity Terrain, matching its position and size so the imported data lines up correctly.
Step 4. Choose What to Import
You do not have to import everything at once. Polaris lets you run the import in passes, enable only what you need each time and click Import.

For the first pass, leave all options enabled to transfer everything in one go. Later passes are useful when you want to tweak just one thing, such as rebaking textures with different settings, without touching the geometry or vegetation already in place.
One option worth knowing upfront is As Albedo Map under the Textures import. Instead of carrying over the Unity Terrain splat layers as-is, it bakes them into a single flat color map, a much better fit for the low poly look. You can leave this off for the first pass and come back to it later (see Step 6).
For trees and grasses, Polaris imports the placements and stores the prototype definitions in a Tree Prototype Group and a Grass Prototype Group asset. These are where you go if you want to swap out the prefabs after import, useful if your original Unity Terrain used realistic tree assets that you want to replace with low poly ones.
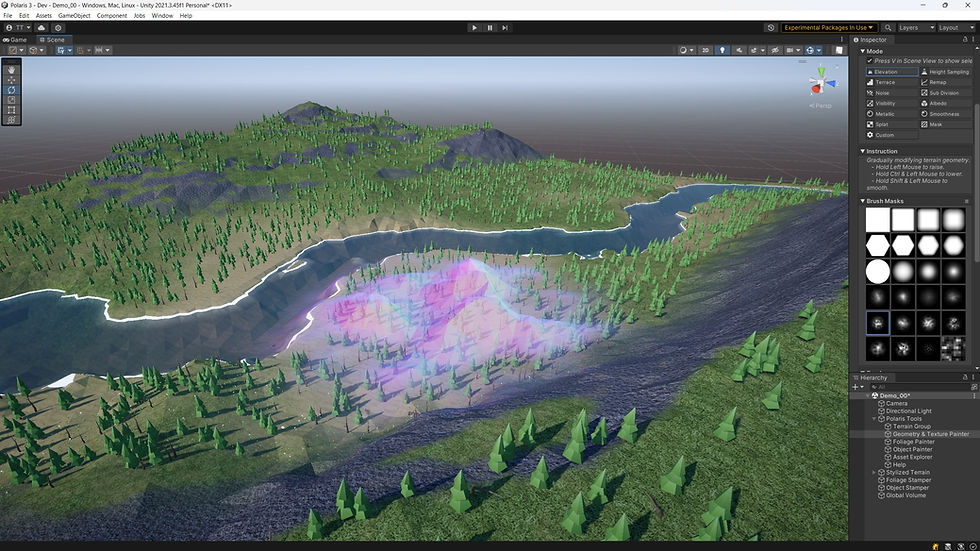
Step 5. Review the Unity Terrain to Low Poly Result
Once the import finishes, hide your original Unity Terrains and check the result. The height, textures, trees, and grasses will have been transferred to the Polaris low poly mesh terrain.


Step 6 (Optional). Rebake Textures as an Albedo Map
For a cleaner result, run a second texture pass using the As Albedo Map option. This bakes all the Unity Terrain splat textures down into a single flat color map, which suits the low poly aesthetic much better than layered splats.
When As Albedo Map is enabled, you will see a Mip Bias setting:
Low Mip Bias: samples fine detail from the splat textures. Can look noisy if the albedo map resolution is limited.
High Mip Bias: samples blurrier mip levels, removes micro detail, and keeps only the broad base colors. This is usually the right choice for low poly environments.
Since the terrain shape, trees, and grasses are already imported, disable all options except Textures before running this pass to keep it fast.
You can run the import as many times as you like with different settings until the result looks right.

Step 7 (Optional). Swap in Low Poly Tree Assets
If your original scene used realistic or high-poly tree assets, now is a good time to replace them. Select the Tree Prototype Group asset in your project, swap each tree prefab for a low poly equivalent, and adjust the base scale to match.
This is what makes the scene read clearly as a low poly environment rather than a converted realistic one.
Summary
The full Polaris workflow in order:
1. Open Terrain Wizard > Create From Existing Data > Migrate From Unity Terrain
2. Add your source Unity Terrains
3. Click Generate Matching Terrains
4. Enable the data you want to import and click Import
5. Optionally rebake textures with As Albedo Map and a high Mip Bias
6. Optionally swap high-poly tree prefabs for low poly ones
About Polaris
Polaris is a mesh based low poly terrain editor for Unity, a native alternative to the built-in Terrain workflow, built for stylized and performance sensitive projects. Because it works on meshes rather than Unity's heightmap terrain, it fits naturally into standard mesh pipelines and gives you stronger control over the visual result.
The Unity Terrain migration in this guide is one entry point into Polaris. Once your terrain is in, you have the full authoring toolkit available: around 20 brush types, stamp and spline tools, hydraulic and thermal erosion, adaptive non uniform mesh density, and GPU instanced vegetation with no GameObject overhead. The converter also works in reverse: if a third party tool needs the built-in Terrain format, you can export back out.
Disclosure: The Polaris links above are affiliate links. I may earn a small commission if you purchase through them, at no extra cost to you.


Comments